Ultra Speed Fast Indexing Wordpress Plugin For Google And Bing

Setup Video
Need Help to setup? Generate Google Json File
Generate Bing Api
The world No.1 WordPress tool to rank Higher and Faster than your competitor.
This Plugin will make your Indexing process automatically and fast.
Steps to Install the plugin in your WordPress.
- Upload Ultra speed fast Plugin , Download Information is given bellow of the page.
Get Your Website Crawled Immediately by Google and Bing Using Their NEW Indexing API.
2 Steps to Create an Indexing API Project
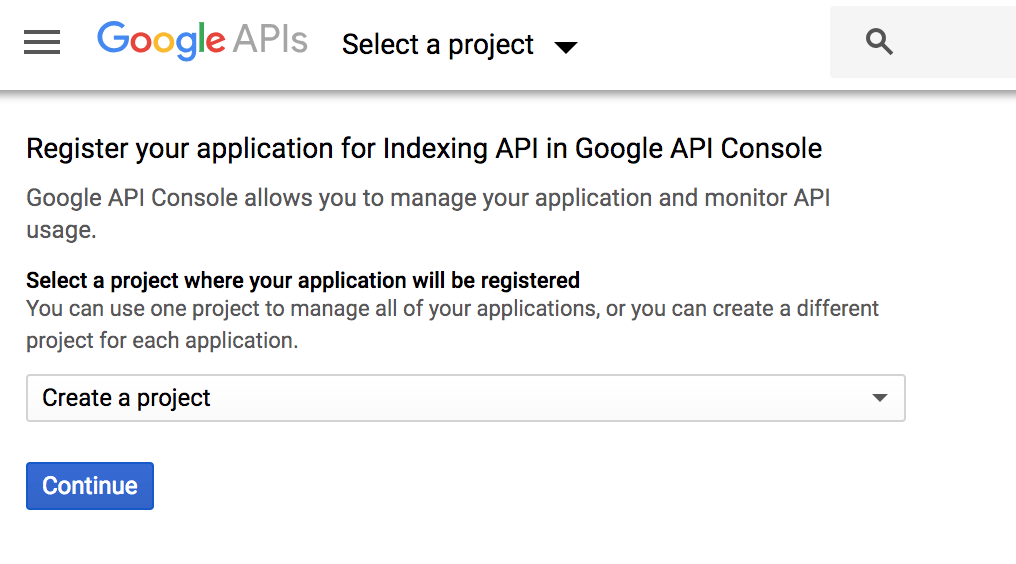
2.1 Go to the Google API Console and create a new project
Ensure that you’re creating a new Indexing API project which you can do automatically by clicking here. And then click continue.
If you see the following screen then you’ve successfully created the project:
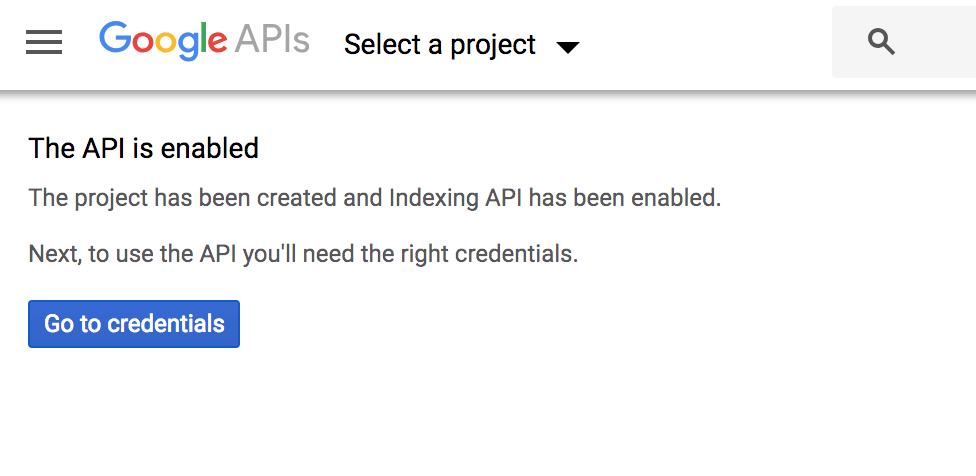
Please note: There is no need to click ‘Go to Credentials’ button. You can close this tab.
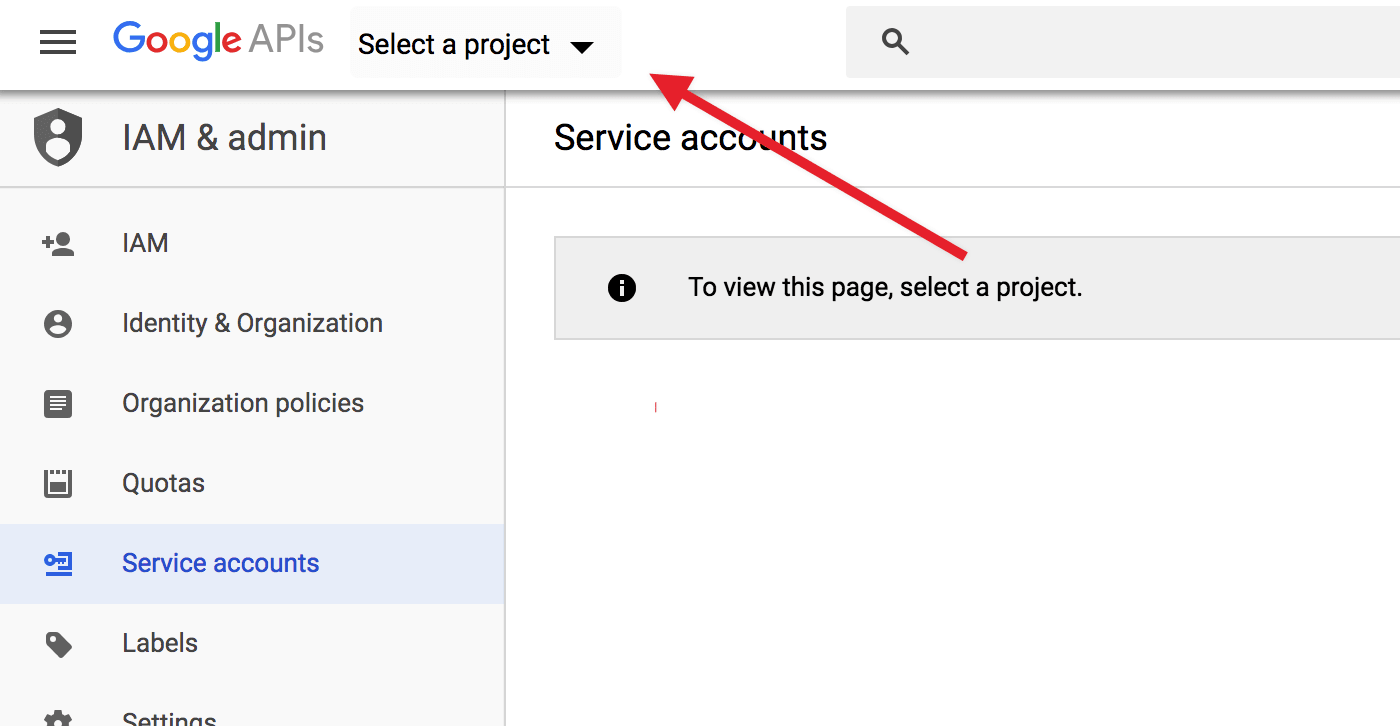
2.2 Now create a Service Account
Once you’ve created your project, create a service account by opening the service accounts page. And, if prompted, select the project you just created using the button near the top of the page:
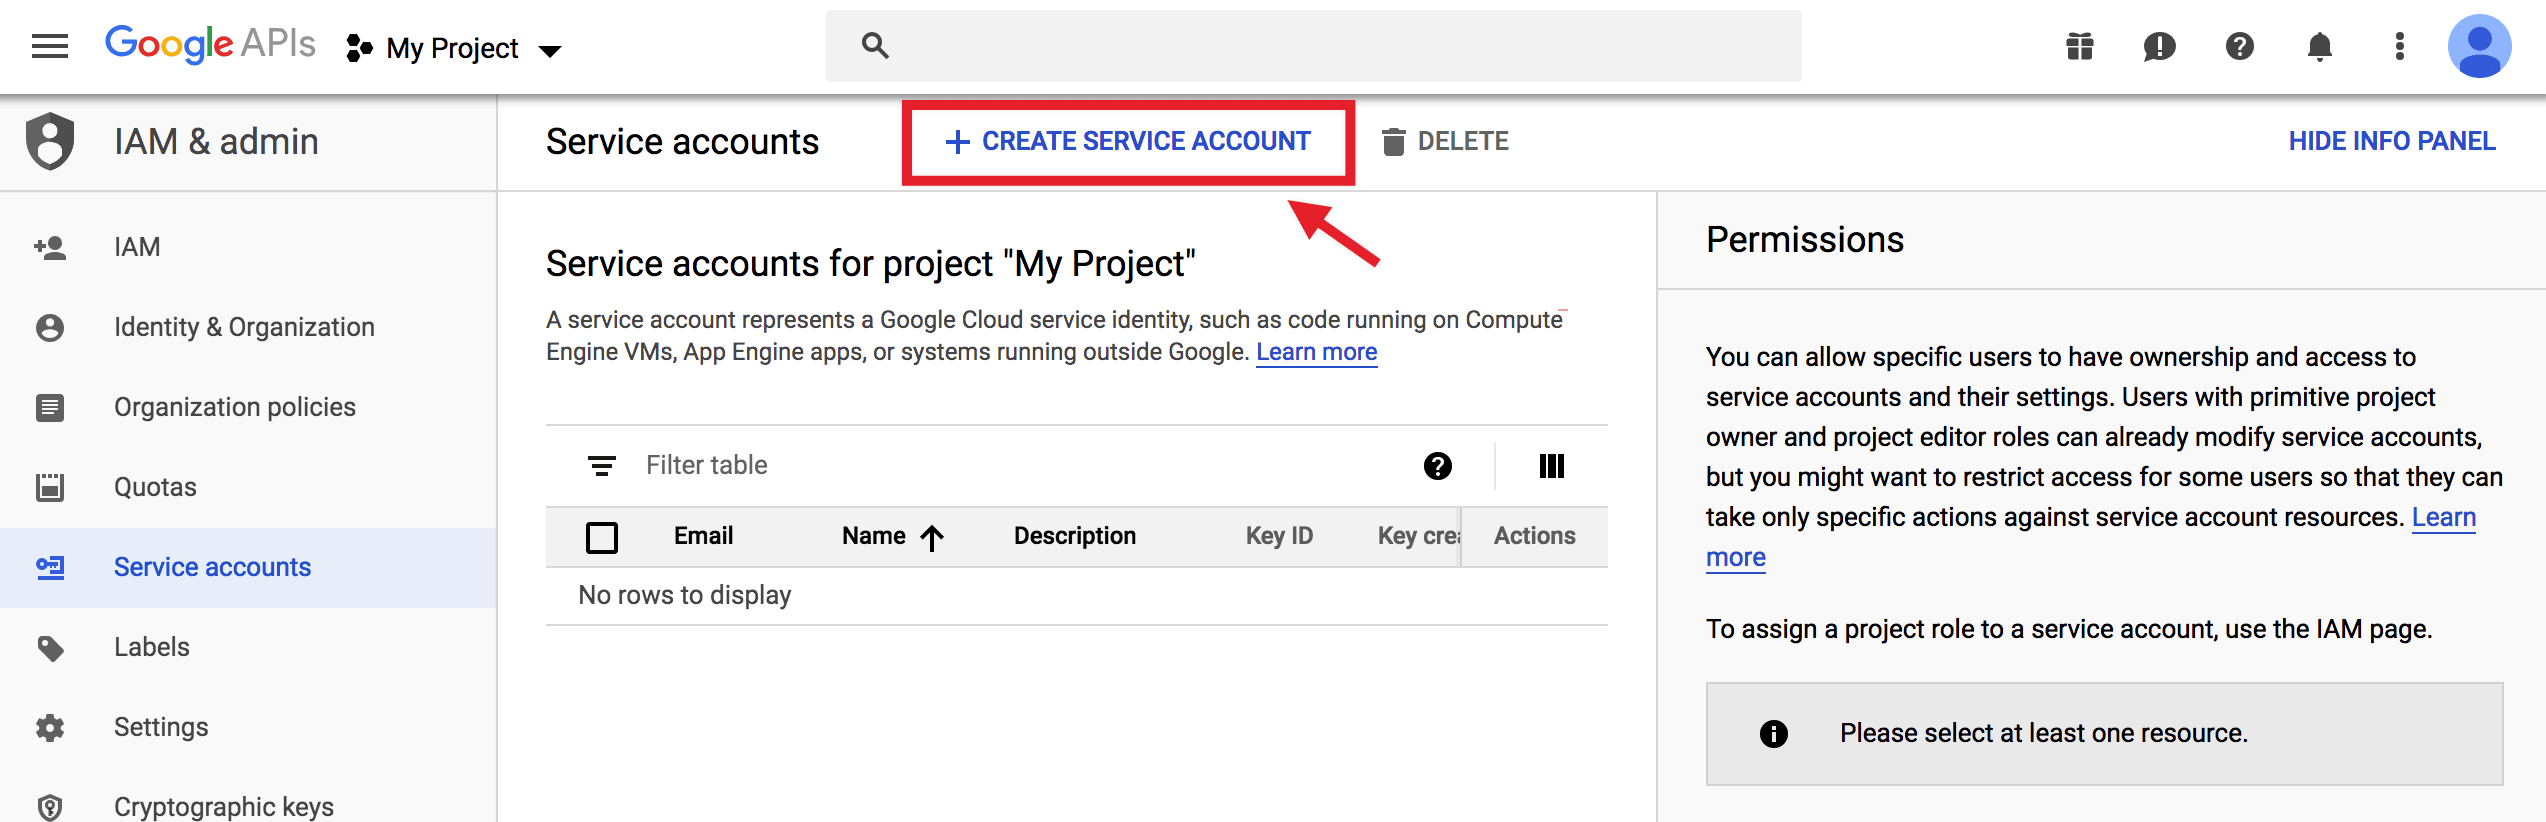
And once you have selected a project, click the Create Service Account button highlighted below:
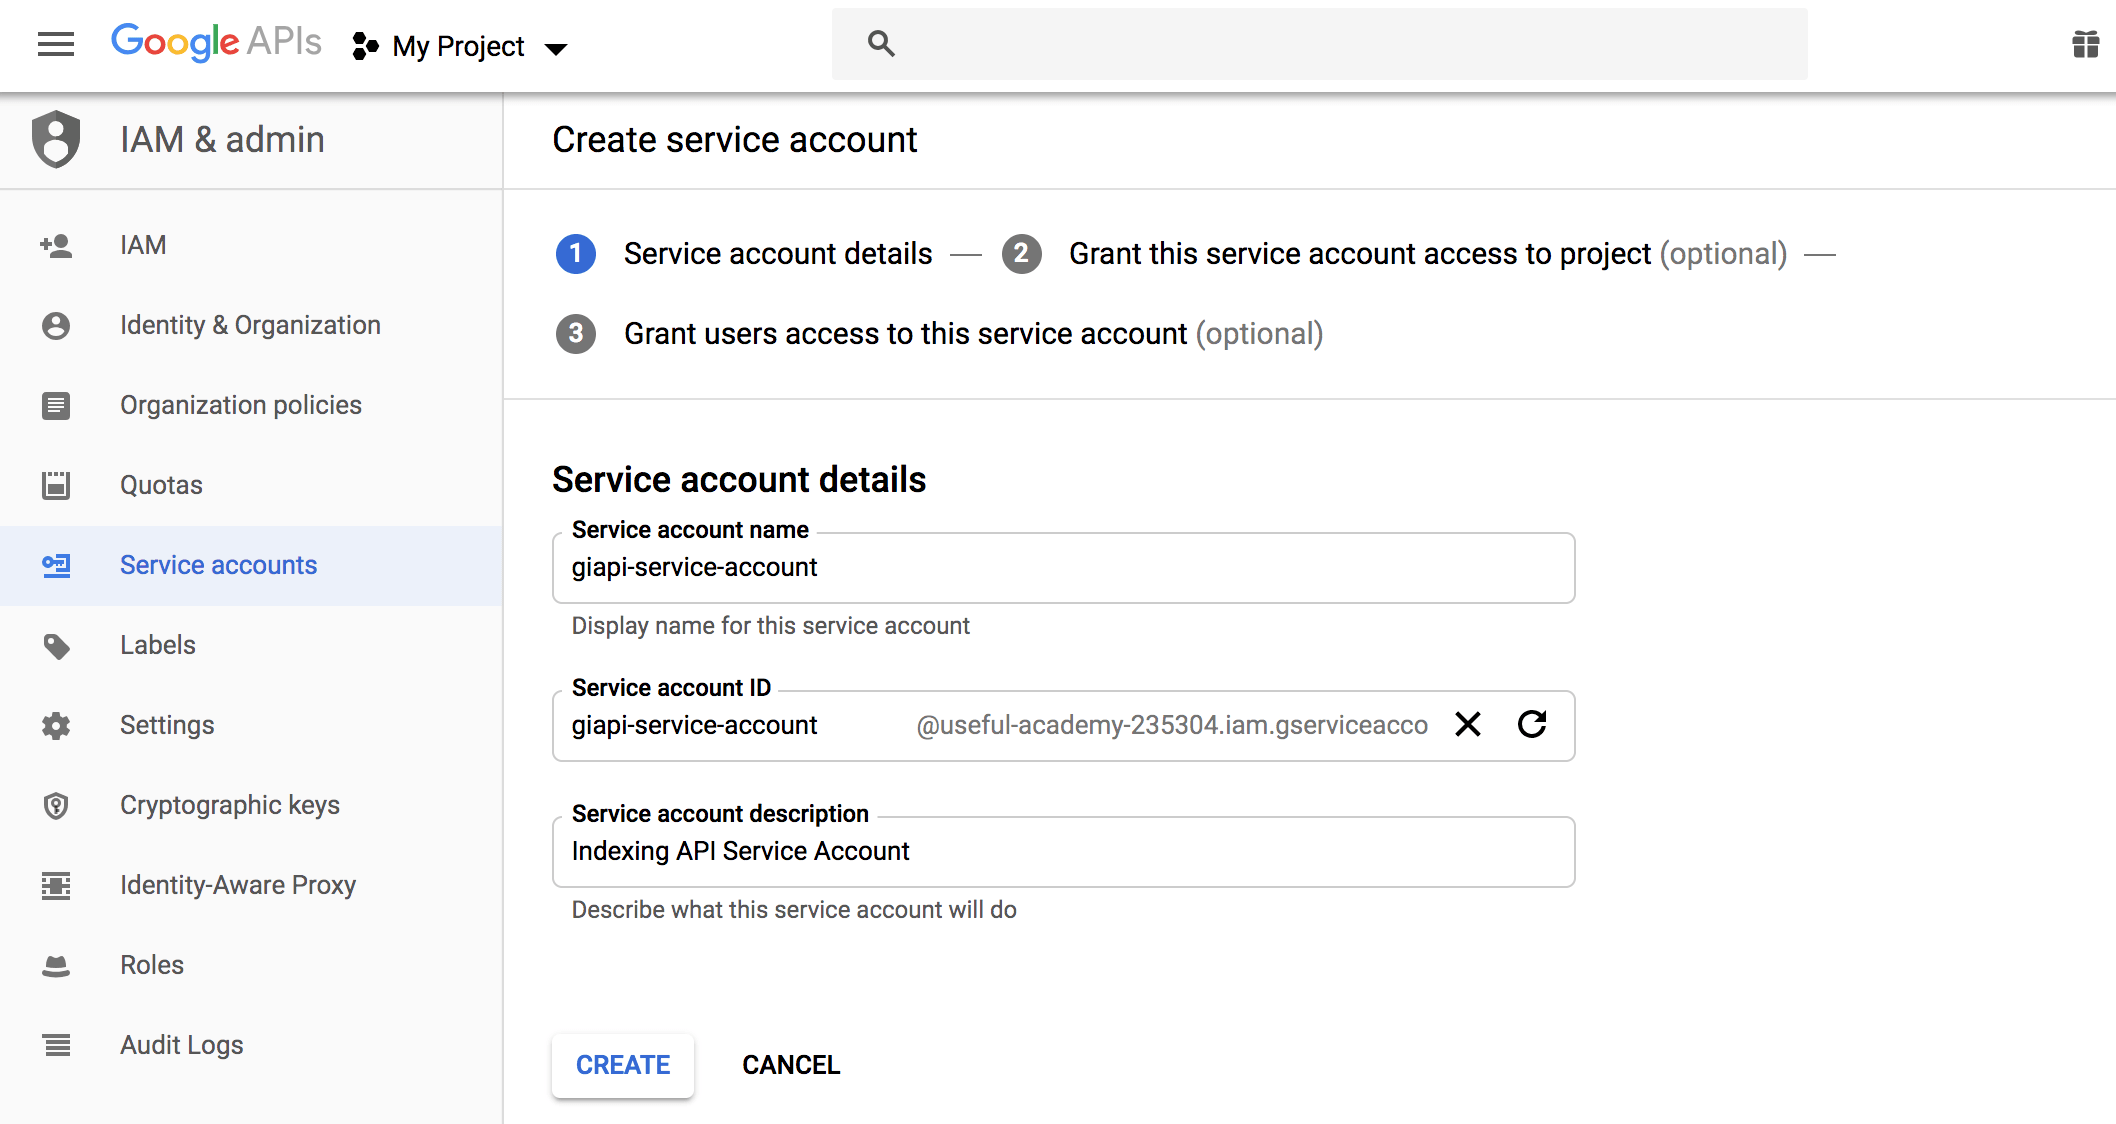
On the Create service account screen, enter a name and description for the newly created service account.
Select and copy the whole Service Account ID (the one that looks like an email address) because you will need it later. Then, click on the Create button at the bottom:
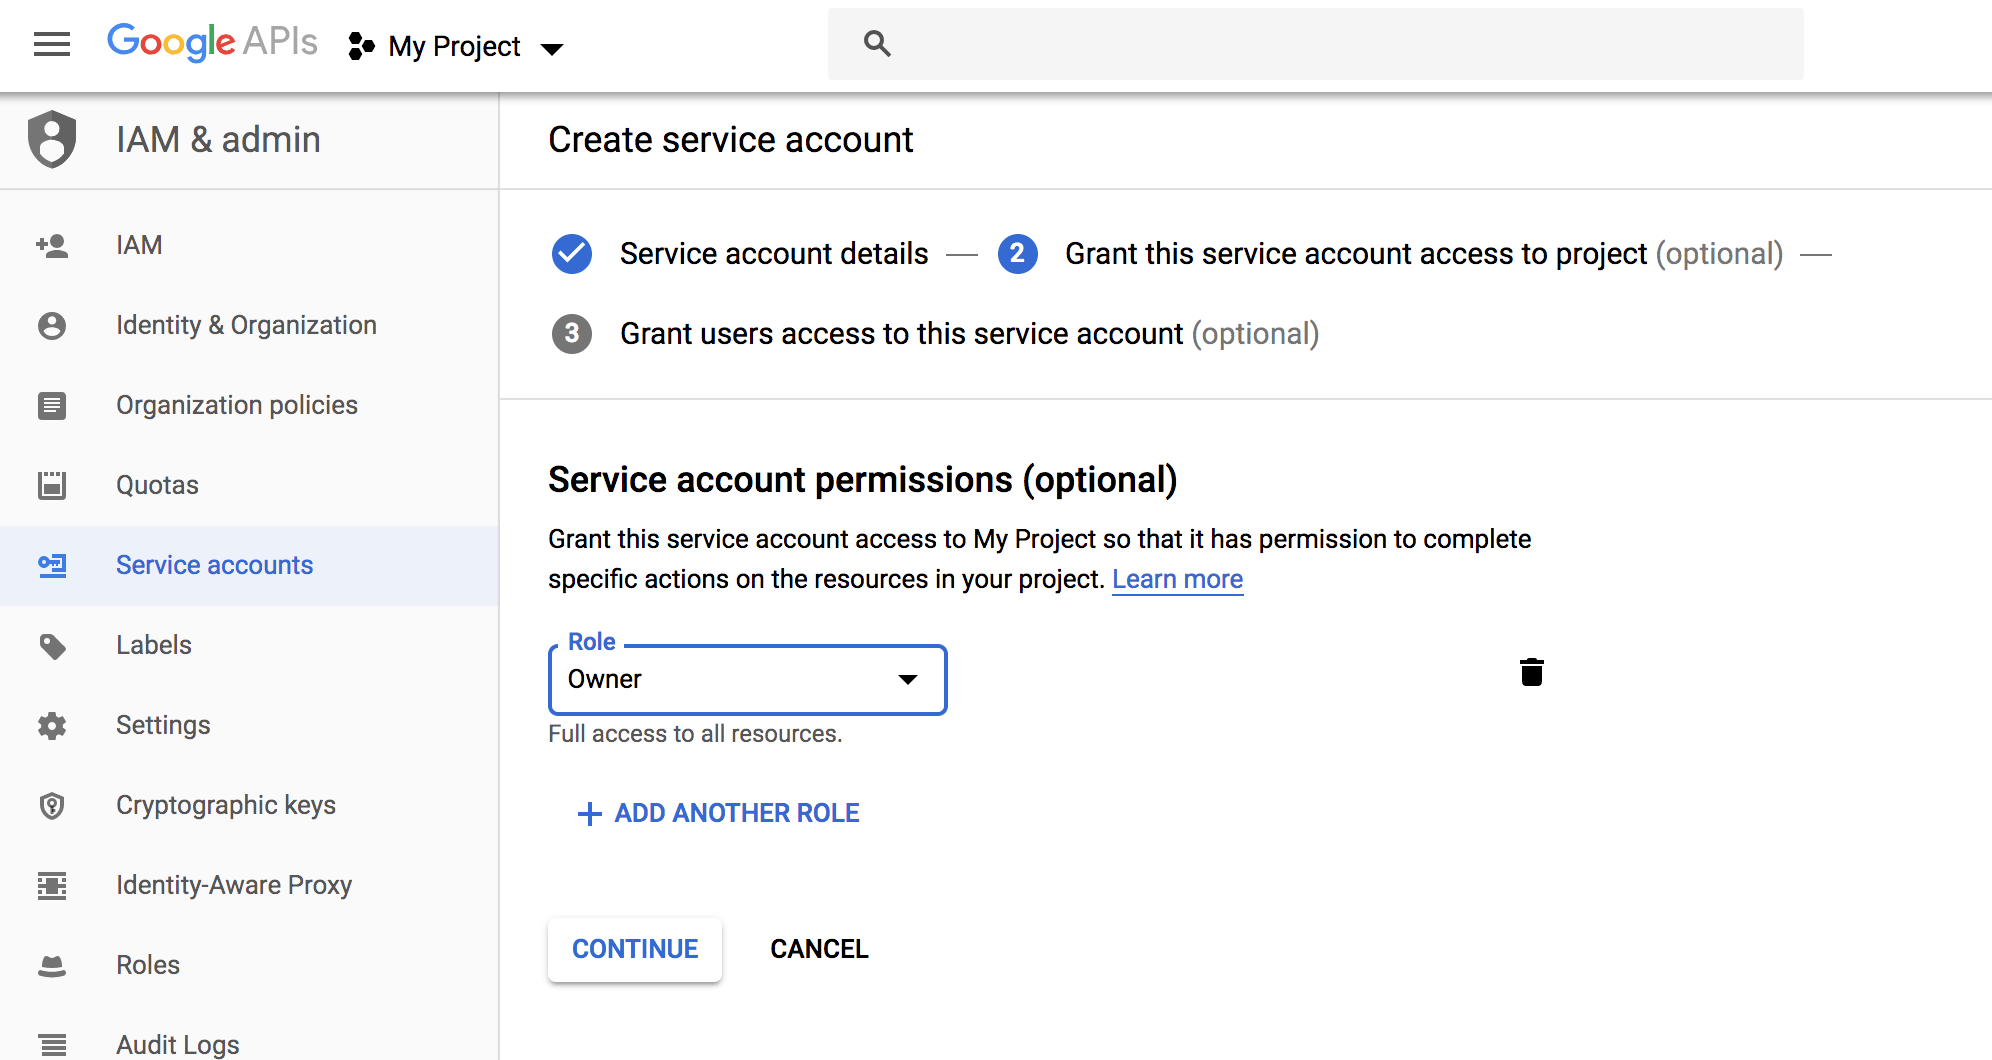
Once you’re taken to the next page, don’t forget to change the role to Owner and, as you might’ve guessed, click continue…
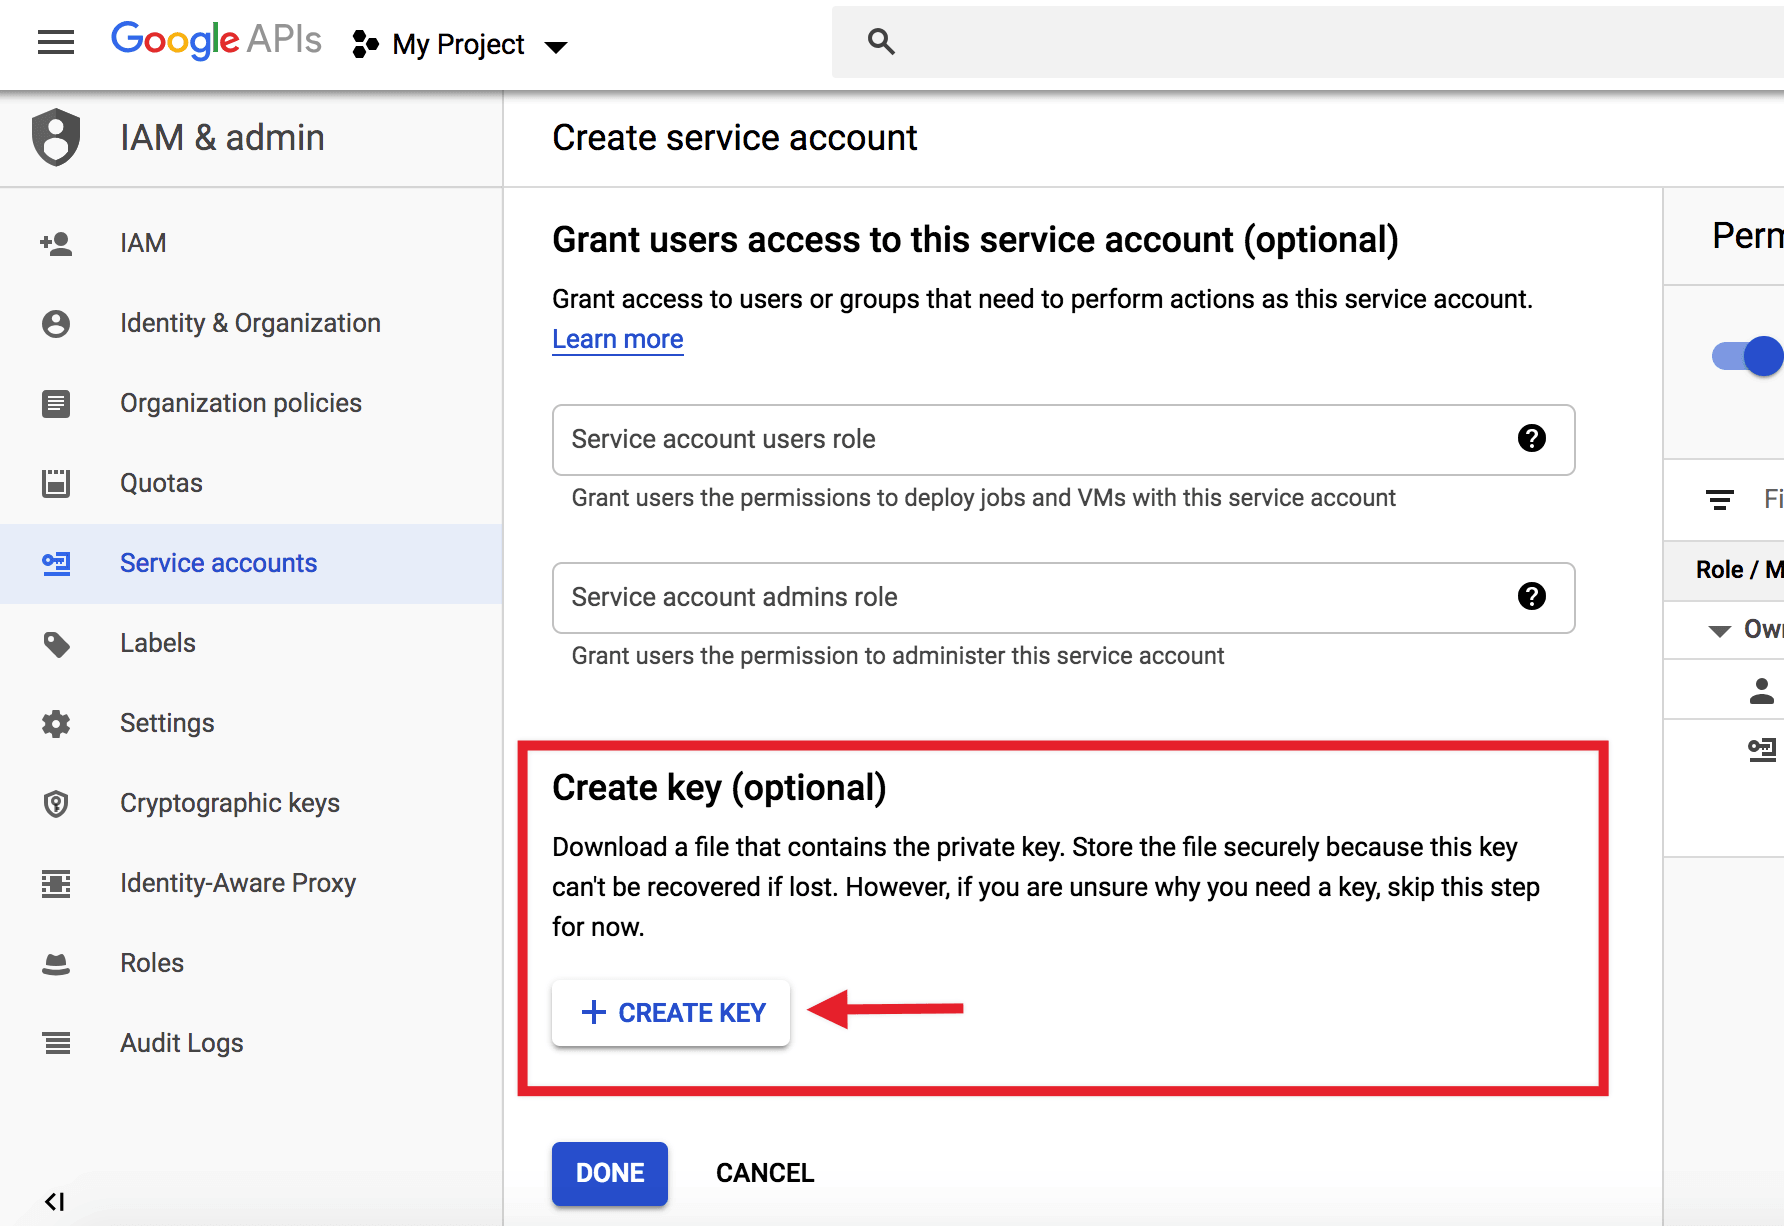
Now download the file that contains your API key by clicking the Create Key button:
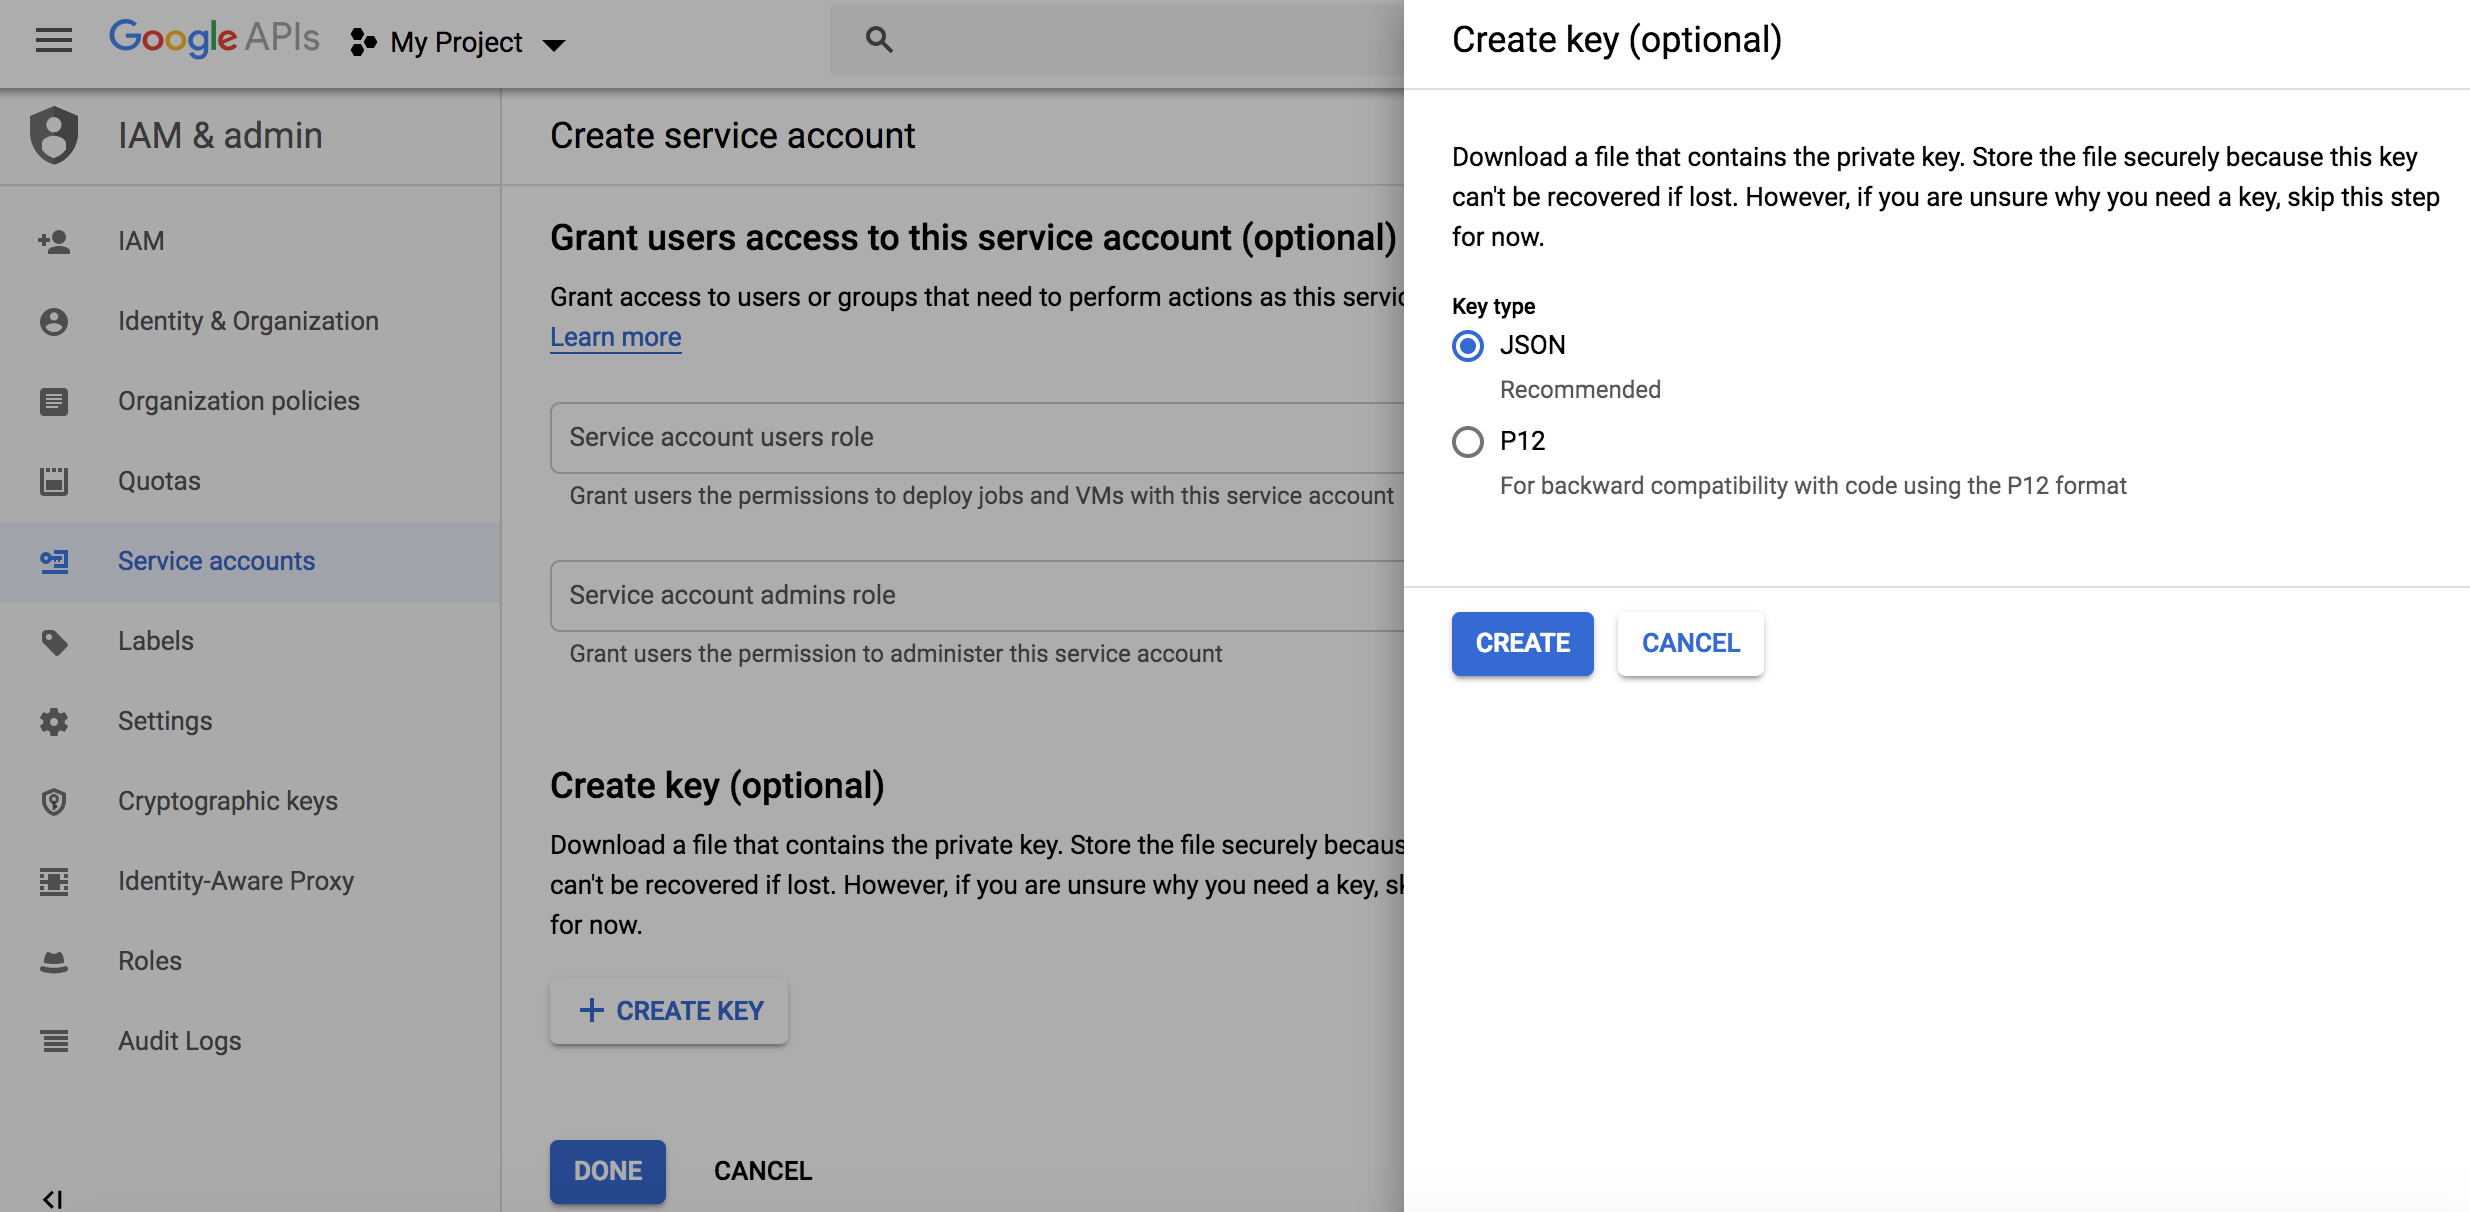
Choose the default JSON format when prompted in the overlay, and click Create:
2.3 Add the Service Account as an owner of your Google Search Console Property
To do this, you’ll need to register and verify your website with the Google Search Console (if you haven’t done so already) which is super easy: just follow the recommended steps to verify ownership of your property.
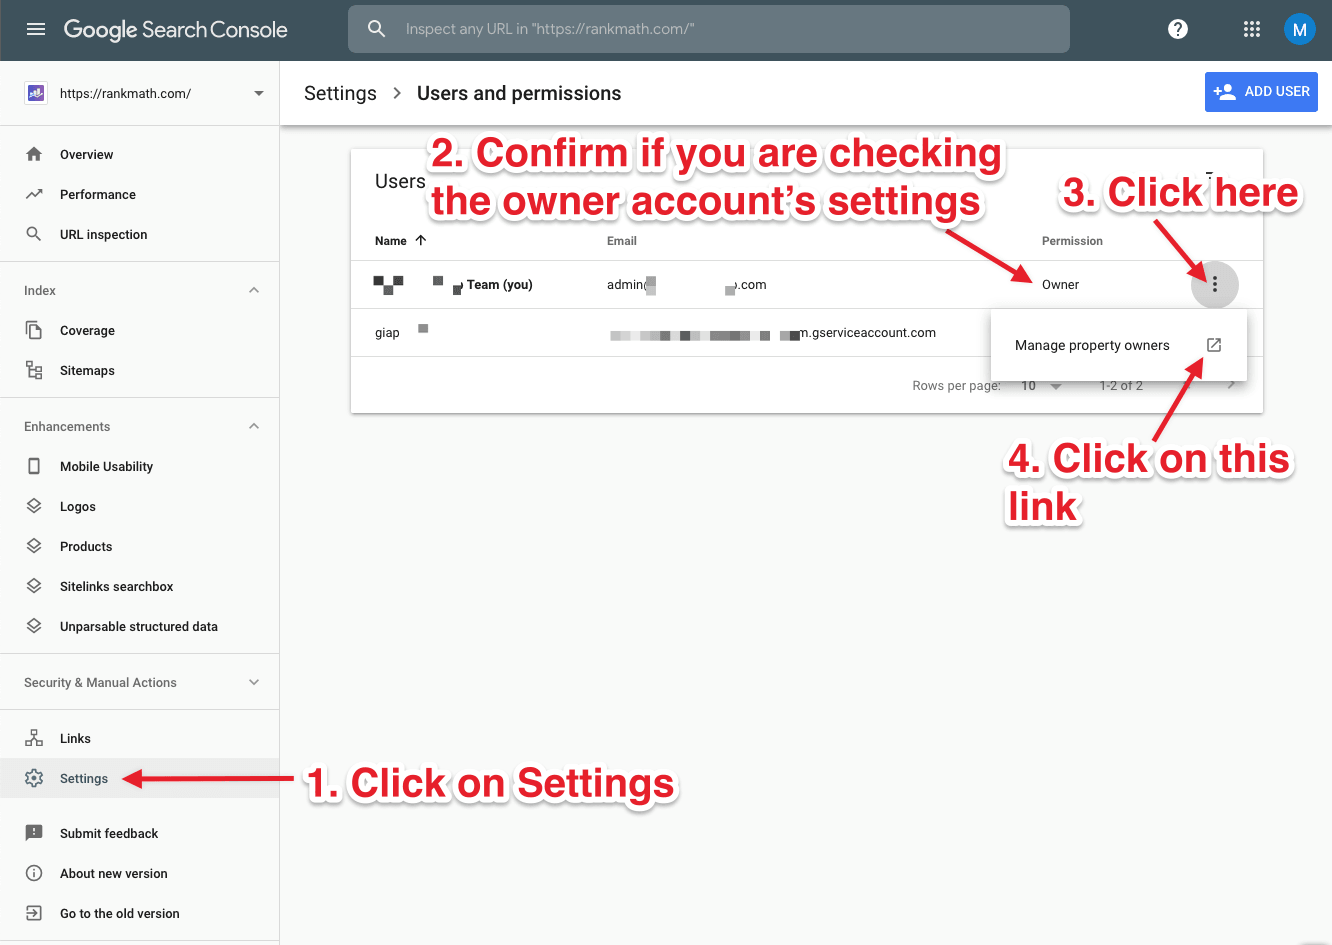
After verifying your property, open the Google Search Console, select your property on the left (if prompted), and then click on Settings near the bottom:
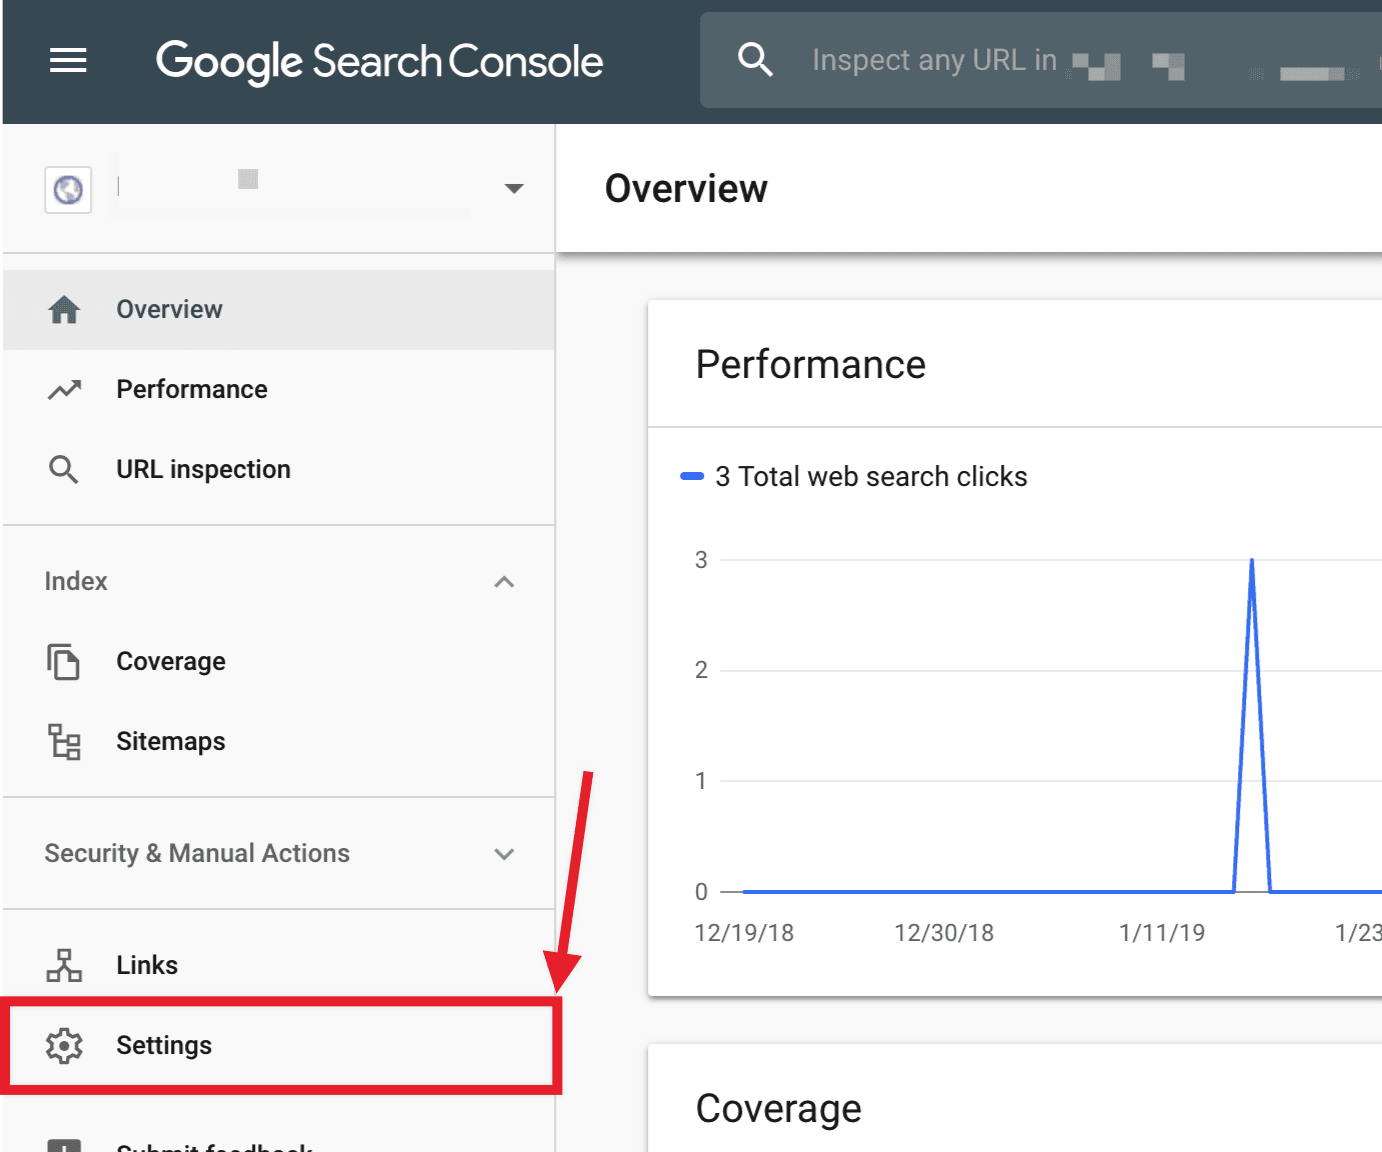
Click on Users and Permissions:
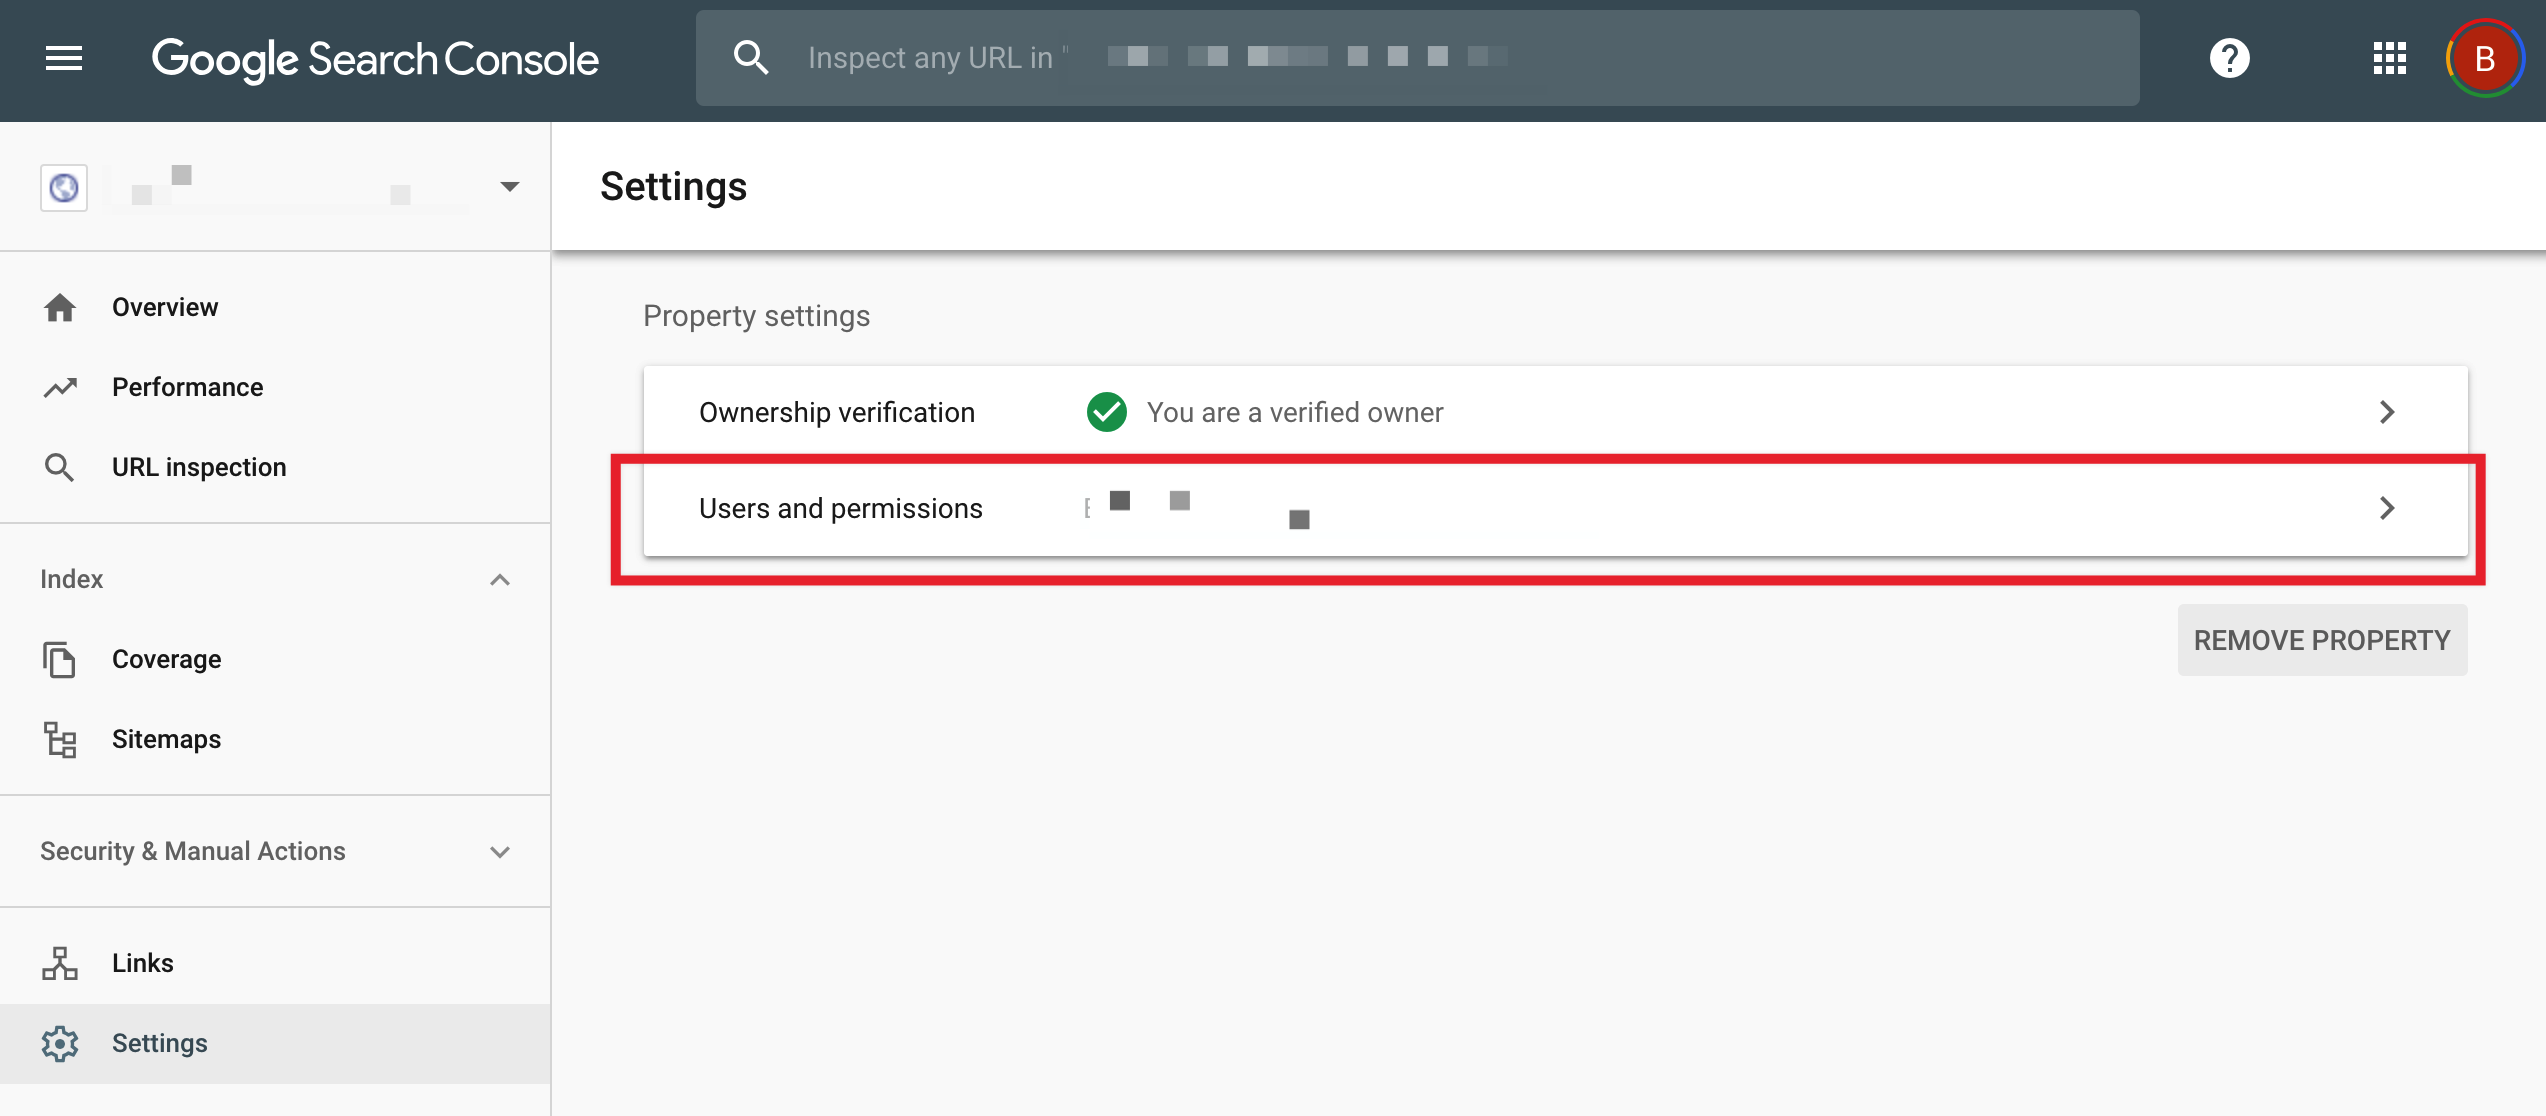
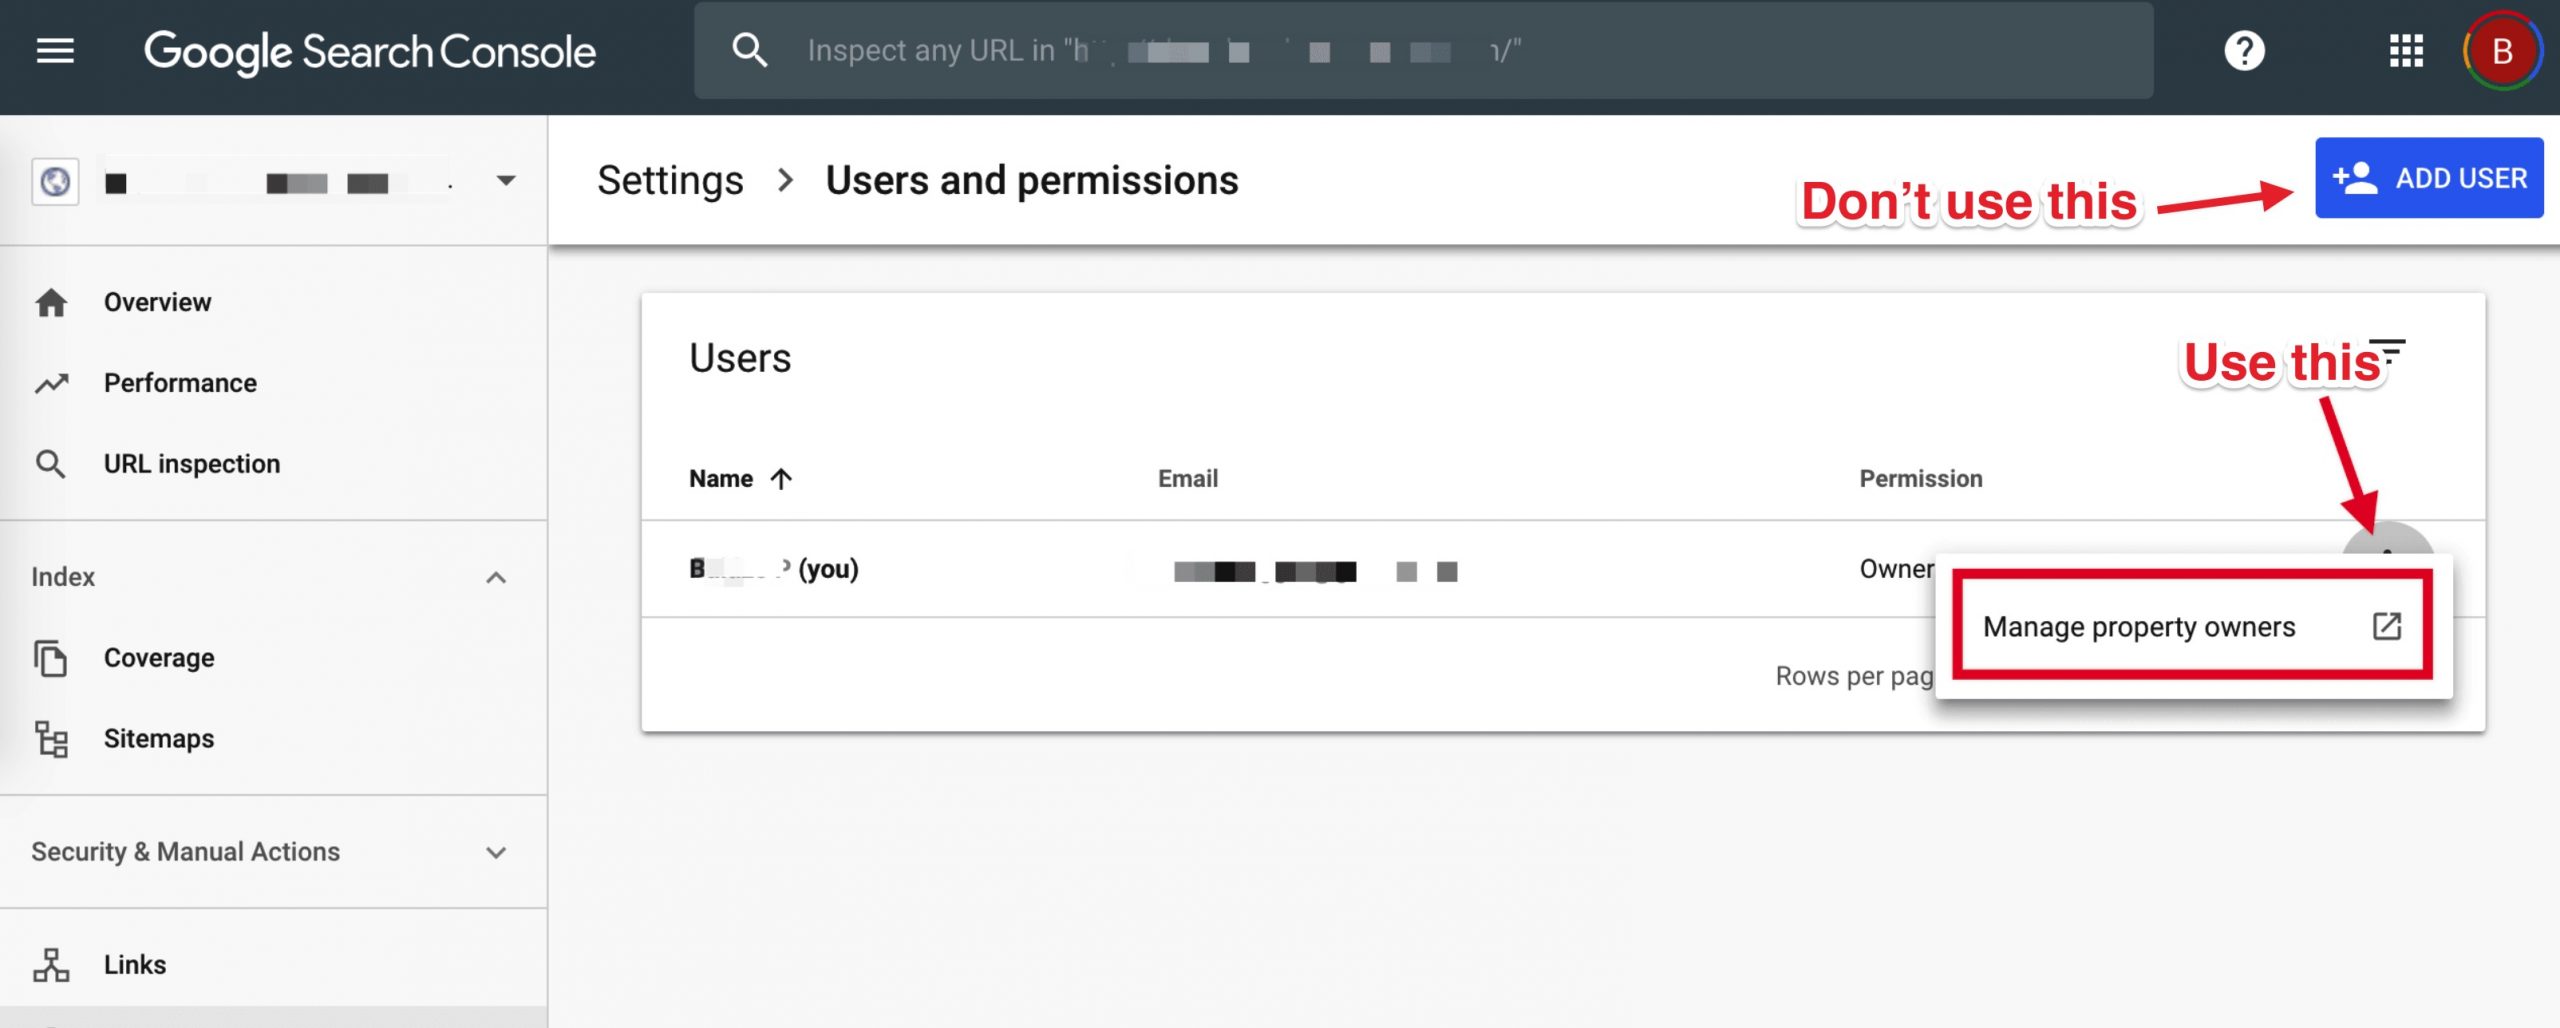
Click on the three dots next to your account, and then click on Manage property owners:
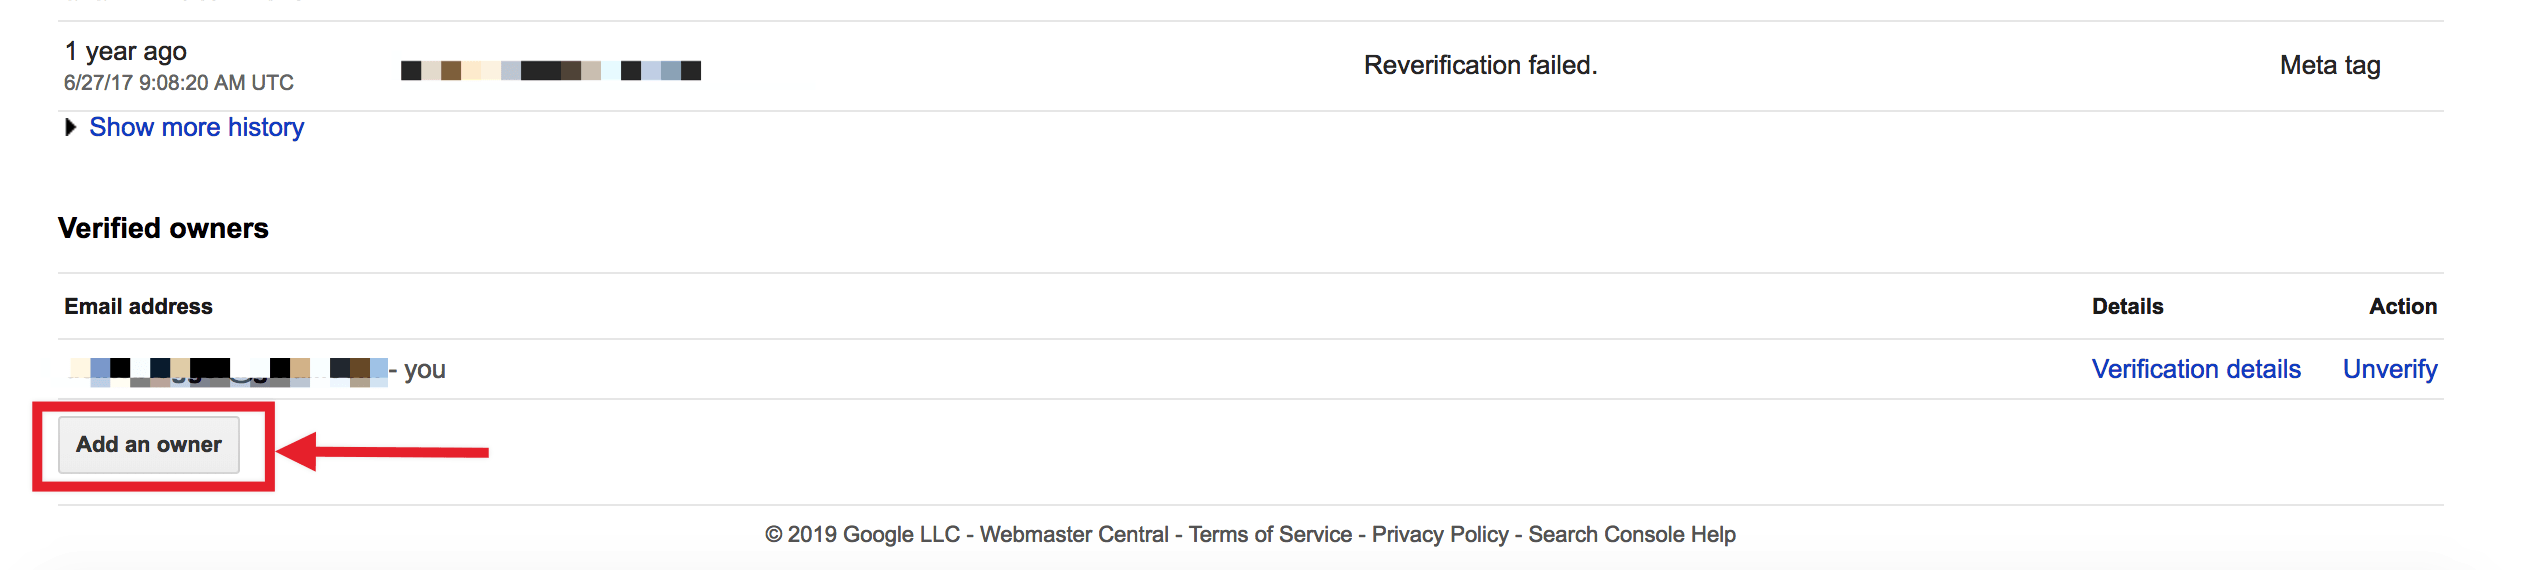
A page will open in a new tab. Scroll to the bottom and click on the Add an owner button in the Verified owners section:
A page will open in a new tab. Scroll to the bottom and click on the Add an owner button in the Verified owners section:

Enter the Service account ID (the one you copied out earlier) in the new owner’s email address field and click Continue:
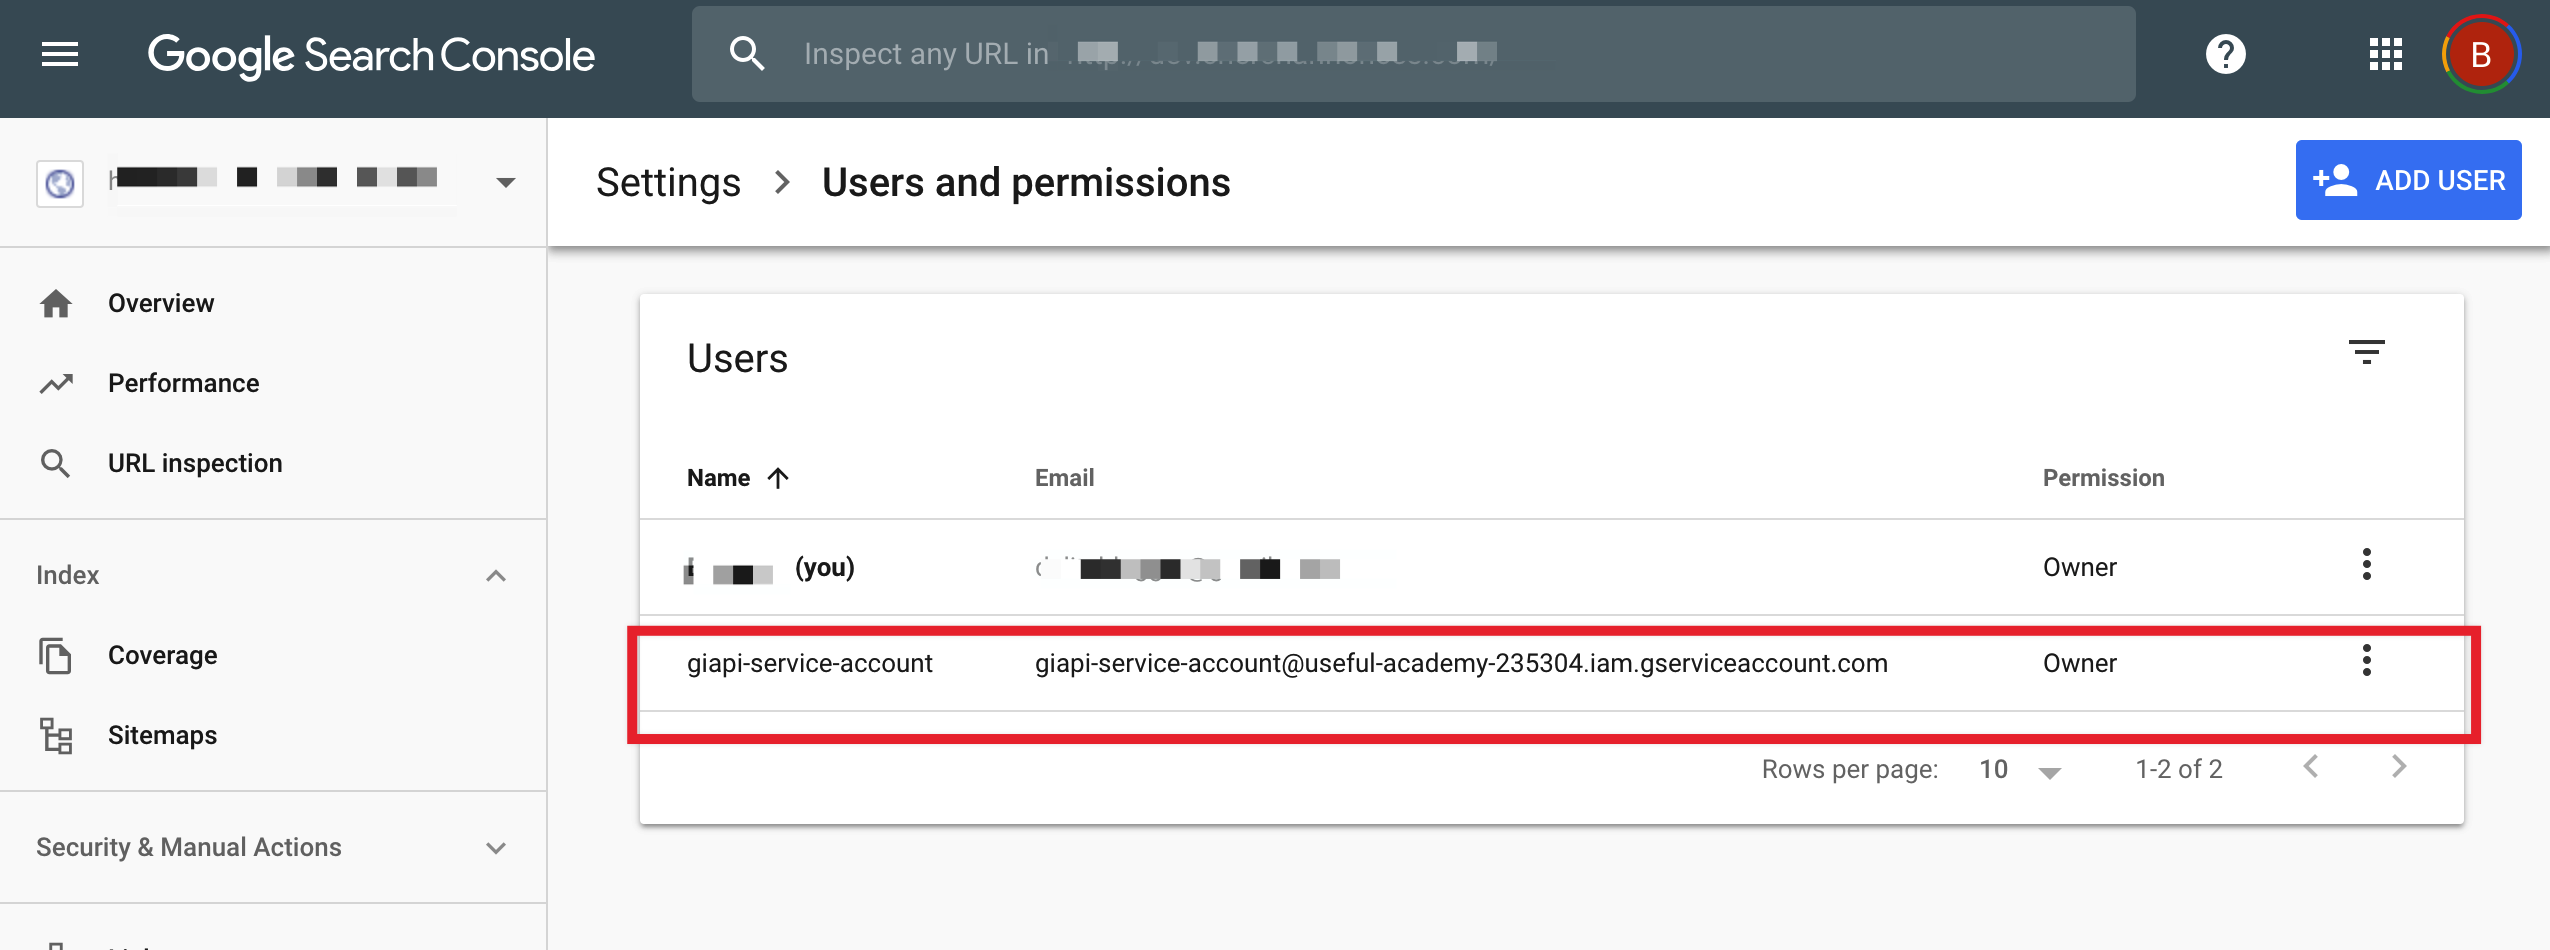
Switch back to the previous tab and refresh it. You should now see the Service account listed as a new Owner.
You can use a single Project, Service Account, and JSON API Key across multiple sites, just make sure that the Service Account is added as Owner for all the sites in the Search Console.
4 Most Common Errors & Their Fixes
4.1 How to install the plugin?
You can install the plugin on your site like any other WordPress plugin, using one of these two methods:
A) Upload via WordPress Dashboard
Upload the ZIP file from your WordPress dashboard, in Plugins > Add New > Upload.
B) Upload it through FTP.
You first have to extract the zip file on your computer and then upload the new folder google-indexing-api-by-rank-math to your server, in the following folder: /wp-content/plugins.
4.2 403 Permission denied. Failed to verify the URL ownership.
Make sure the service account is listed as Owner for the site in Search Console:
If you don’t see it there, follow these steps:
On the next page, add the service account as an owner with the button:
Then, head back to the Search Console and refresh to confirm that the service account has been added correctly.
4.3 404 Requested entity was not found.
Use the API Console to Publish/update the page once, then you can use the Get status action.
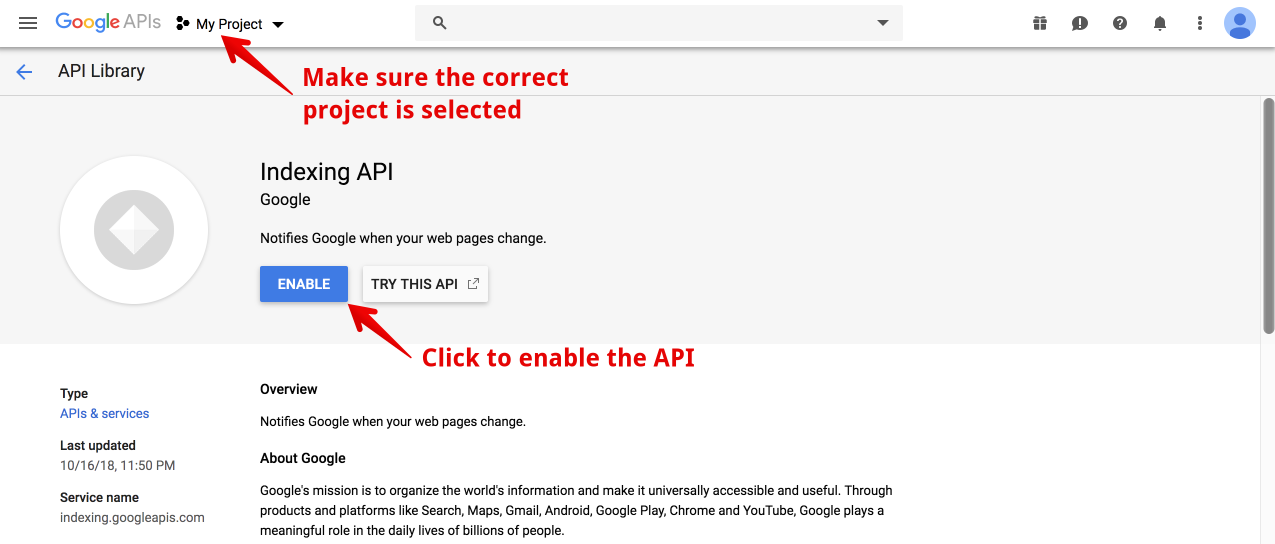
4.4 403 Indexing API has not been used in the project [project name] before or it is disabled. Enable it by visiting [URL] then retry.
Copy and paste the URL in your browser to open it, or go to this page and select your project in the dropdown near the top, then enable the API:
4.6 Can I use the same API Project/Service Account/JSON API key for multiple sites?
Yes, you can use the same project, service account, and API keys across multiple sites, just make sure to set the service account as Owner of all the sites in Search Console.
4.7 Can I request indexing of pages from different websites from just one website?
No. You can only request indexing for URLs in a domain from the domain itself, not other websites, even if they are verified with the same Service Account. For example: if you use the same service account on website A and website B, then you cannot request indexing of URLs of website B from website A. You would have to do it from website B itself.
4.8 Can I submit pages that do not have Job Posting or Livestream structured data?
The API officially supports pages containing Job Posting and Livestream structured data, and it is recommended to use only on such websites.
However, from our internal tests and our public beta it seems that Google crawls, indexes (if the content is original, new, and helpful), and follow links on any page you submit through the API, regardless of its structured data.
4.9 It’s been more than 24 hours and Google still didn’t index my page. What to do?
In our tests, Googlebot crawled the pages we published through the API within minutes, and you can confirm the same on your site by checking the access logs.
This however, does not always result in the indexation of the content. It may take anywhere from minutes to days or even weeks before a URL shows up in the search results. Using this plugin doesn’t guarantee that your pages will show up in the search results.
Bing Webmaster Tools API Key
This is a short tutorial on how to find your Bing Webmaster Tool’s API key. It is very easy, but I still get asked this a lot. There are a couple different reasons you might need this. One example is if you are managing multiple Bing accounts within Raven Tools, to authorize the 2nd Bing account, you have to have an API key.
Step 1
Login to Bing Webmaster Tools.
Step 2
Click into your website. This assumes you have setup your website in Bing already. I also recommend submitting your sitemap to Bing as well.

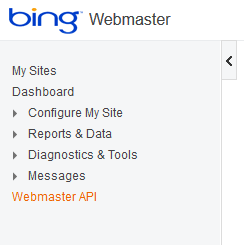
Step 3
On the left hand side click into “Webmaster API.” You will have to accept the service agreement which will pop up.
Step 4
Click on the “Generate” key and then you can copy the API key from the box below. (yes mine is scrambled folks)

And that’s it! As always feel free to leave your comments below.
Configure Your Plugin

Fill the Fields in Ultra Fast Setting Plugin with above keys and files.
Test Your Api

View All Error Logs

View All Success Logs

This Plugin cost is Free of cost for 50 request, That means you have to pay after 50 requests for this Plugin.
If you really need to upgrade your technology ,then you should have this plugin , for get this Fast index plugin you have to contact us because our download platform is not ready , we are working on it But You can get this plugin with only single message we will definitely reply you within 30 minutes.
Email: [email protected]